In the age of digital photography, it’s easy to overlook the charm of printed images. A themed photo gallery not only personalizes your home but also serves as a great icebreaker when friends and family visit. In this guide, we’ll walk you through the steps to curate a stunning photo gallery that reflects your personal style and captures sweet memories. Plus, learn how the F2.8 G Master lens can take your photography to the next level.
Choosing a Theme for Your Gallery
The first step in creating a photo gallery is selecting a theme that resonates with you. Here are some theme ideas to consider:
- Travel Adventures: Feature your favorite travel memories and landscapes.
- Family Moments: Showcase candid shots of family gatherings and milestones.
- Nature Wonders: Create a serene gallery filled with stunning nature photography.
- Abstract Art: Play with shapes, colors, and textures to create an artsy vibe.
Once you have your theme, gather photos that best represent it. Use your F2.8 G Master lens for remarkable clarity and detail, making your printed images pop!
Preparing Your Photos
Quality matters when it comes to printing photos. Here are some tips to ensure your images are print-ready:
Editing for Perfection
Use photo editing software to enhance your pictures. Adjust brightness, contrast, saturation, and sharpness to create visually appealing images. With the F2.8 G Master lens, you’ll find that your original shots will often require minimal adjustments, showcasing the lens’s capability to render beautiful details straight from your camera.
Choosing the Right Dimensions
Consider your wall space when determining the dimensions for your prints. Mix and match small, medium, and large sizes to create depth in your gallery. A variety of sizes will also guide the viewer’s eye throughout the display.
Selecting the Right Prints
High-quality prints are crucial for achieving a polished look. Consider these options when choosing how to print your photos:
- Standard Prints: Affordable and readily available in most photo centers.
- Canvas Prints: Adds texture and depth, perfect for larger images.
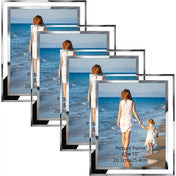
- Framed Prints: Offers a classic look that can elevate the presentation.
- Metal Prints: A modern option that makes colors vibrant and sharp.
The quality of your prints can heavily rely on the initial captures. Using the F2.8 G Master lens assures you exceptional image quality, making your printed photos look stunning on any medium.
Picking a Location
The next step is selecting the perfect wall space for your gallery. Here’s how to find the ideal location:
Wall Size and Shape
Consider the size and shape of the wall you’re working with. Narrow hallways may benefit from tall, thin prints, while a wide living room wall is perfect for expansive layouts. Take measurements and visualize how your chosen prints will fit together to avoid overcrowding or leaving empty spaces.
Lighting Considerations
Natural light can have a profound effect on how viewers perceive your gallery. Avoid direct sunlight on your prints, as it may lead to fading over time. Instead, opt for a wall that receives indirect light, allowing your images to shine without damage. Knowing this can also help when you’re shooting your photos; capturing images during golden hour with your F2.8 G Master lens can lead to breathtaking results.
Arranging Your Gallery
Now comes the fun part: arranging your photos. Follow these strategies to achieve a polished look:
Layout Styles
You can choose from various layout styles, such as:
- Grid Pattern: Arrange prints symmetrically for a modern look.
- Salon Style: Mix different sizes and orientations for an artistic flair.
- Linear Arrangement: Line up your photos horizontally or vertically for a clean presentation.
Take a step back to ensure visual balance. Ensure no single part of the gallery feels too crowded or sparse.
Using Frames Wisely
The frames you choose can significantly impact the overall vibe of your gallery. Consider matching frames for a cohesive look or using an eclectic mix for a more whimsical approach. Don’t forget to measure and hang frames at eye level for the best viewing experience!
Final Touches
Once your photos are hung, take a step back and admire your work! You might find that your gallery would benefit from a few final touches. Here are some ideas:
Decorative Elements
Add decorative elements to the gallery to enhance its charm. You could include:
- Plants: Small plants or flowers can bring life to your gallery.
- Shelves: Utilize floating shelves to display smaller decorative items alongside your photos.
- Lighting: Use spotlights or frame lights to highlight key pieces of the gallery.
These touches can transform your gallery from a simple photo display to an engaging exhibit that reflects your personality.
Promoting Your Gallery
After setting up your themed photo gallery, you might want to share your efforts with others. Use social media platforms or your personal blog to highlight your new display. Here are some tips for promoting your gallery:
Engage with Your Audience
Post images of your gallery setup on platforms like Instagram or Facebook. Encourage your friends and followers to visit and provide their feedback. Perhaps even share the techniques you used, particularly how the F2.8 G Master lens helped elevate your photography.
Host Gallery Nights
Consider hosting a gallery night at your home. Invite friends and family over for an evening to celebrate your new display. This could be a fun opportunity to discuss your favorite photos, your photography journey, and the gear you cherish, like your beloved F2.8 G Master lens.
Creating Lasting Memories
Establishing a themed photo gallery is not just about decorating your walls; it’s about telling your story through images that resonate with your experiences and emotions. By following these steps and utilizing valuable tools such as the F2.8 G Master lens, you can create a beautiful space that not only showcases your photography skills but also honors the moments that matter most to you.
So go ahead, grab your camera, and start capturing memories worthy of display. Your home will thank you for it!
Discover the creations of a fellow Shopify or Wix store owner. Check out their online store here. Please remember that this is a promotional link, and we are not liable for the content of the linked store.