Are you tired of taking the same old ordinary photos? Do you want to add a touch of magic and create stunning, dreamy effects in your photography? Well, look no further! Long exposure photography is the secret ingredient that can take your images to a whole new level. In this article, we will explore the art of mastering long exposure photography and how you can create those mesmerizing, ethereal effects that will leave your viewers in awe.
What is Long Exposure Photography?
Long exposure photography involves using a slow shutter speed to capture the movement of subjects over an extended period. By using longer exposure times, you can create unique effects such as light trails, motion blur, and silky smooth water. This technique is often used in landscape, cityscape, and nighttime photography to capture the passage of time and bring a sense of motion into still images.
Equipment You'll Need
Before we dive into the techniques, let's talk about the necessary equipment you'll need to get started with long exposure photography:
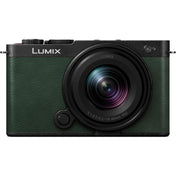
- A DSLR or Mirrorless Camera: While you can experiment with long exposure on a smartphone, having a camera with manual settings will give you more control and better results.
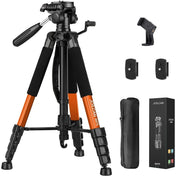
- A Sturdy Tripod: Since long exposure requires a slow shutter speed, it's crucial to keep your camera steady. A tripod will help you achieve sharp images without any camera shake.
- Neutral Density (ND) Filters: ND filters are like sunglasses for your camera, reducing the amount of light that enters the lens. They allow you to use longer exposure times even in bright conditions.
- A Remote Shutter Release: A remote shutter release or cable release will prevent any camera shake caused by pressing the shutter button manually.
Choosing the Right Location
The location you choose for your long exposure photography can make a significant difference in the final image. Look for places with interesting subjects that have potential for movement, such as flowing water, moving clouds, or busy city streets. Consider the direction of the light and how it will interact with the elements in your scene. Experimenting with different locations will help you discover unique compositions and create more captivating images.
Setting Up Your Camera
Now that you have your equipment ready, it's time to set up your camera for long exposure photography:
- Switch to Manual Mode: Manual mode allows you to have full control over your camera's settings. Set your camera to Manual (M) mode to adjust the shutter speed, aperture, and ISO manually.
- Choose a Low ISO: To minimize digital noise in your images, select a low ISO setting such as ISO 100 or 200.
- Select a Small Aperture: A small aperture, represented by a larger f-number (e.g., f/16), will help you achieve a greater depth of field and ensure that both the foreground and background are in focus.
- Attach an ND Filter: Depending on the lighting conditions, choose an appropriate ND filter to reduce the amount of light entering the lens. This will allow you to use longer shutter speeds without overexposing the image.
- Compose Your Shot: Take your time to compose your shot and frame your subjects creatively. Use the rule of thirds or leading lines to add interest and guide the viewer's eye through the image.
- Focus Manually: Since autofocus may struggle in low light conditions, it's best to switch to manual focus and adjust it accordingly.
- Use a Remote Shutter Release: To avoid camera shake, use a remote shutter release or the self-timer function to trigger the shutter without touching the camera.
- Experiment with Shutter Speed: The ideal shutter speed for long exposure photography varies depending on the effect you want to achieve. Start with a few seconds and adjust accordingly. Longer shutter speeds will create more motion blur, while shorter speeds will freeze more of the action.
- Review and Adjust: After taking a shot, review the image on your camera's LCD screen. Make any necessary adjustments to the settings or composition before capturing more photos.
Adding the Finishing Touches
Once you have captured your long exposure images, it's time to add the finishing touches during post-processing:
Adjust the White Balance: Depending on the lighting conditions, you may need to fine-tune the white balance to achieve the desired color temperature. Experiment with different settings to create the mood you envision.
Enhance the Contrast: Long exposure images sometimes appear flat. Use contrast adjustments to bring out the details and make your subjects pop.
Remove Unwanted Elements: During long exposure, you may have unintentional elements in your frame, such as moving people or distracting objects. Use the clone stamp or healing brush tool to remove these distractions and create a cleaner composition.
Sharpen and Resize: Apply the appropriate sharpening techniques to enhance the details in your image. If you plan to display your photos online, resize them to the appropriate dimensions to ensure faster loading times.
Share Your Masterpieces
Now that you have mastered the art of long exposure photography and added your finishing touches, it's time to share your masterpieces with the world. Consider creating an online portfolio or sharing your work on social media platforms to showcase your unique vision and inspire others.
Remember, long exposure photography is all about experimentation and capturing the magic of time passing by. So grab your camera, find a stunning location, and let your creativity flow. With practice and patience, you'll soon be creating dreamy, captivating images that transport your viewers into a world of wonder.
So, what are you waiting for? Go out there and start capturing those mesmerizing, dreamy effects today!
Ready to take your photography to the next level? Check out our collection of photography gear and accessories to enhance your long exposure photography experience. Happy shooting!

