As a photographer, capturing stunning images in low light conditions can be a challenging yet rewarding experience. Whether you're shooting in dimly lit interiors or under the stars in the night sky, low light photography opens up a world of creative possibilities. However, it requires a different set of skills and techniques compared to shooting in daylight. In this article, we will share 10 expert tips to help you elevate your low light photography game.
1. Embrace Manual Mode
When shooting in low light, relying on automatic settings can often lead to disappointing results. To have full control over your camera settings, switch to manual mode. This allows you to adjust the aperture, shutter speed, and ISO according to the available light. By manually setting these parameters, you can create the desired exposure and capture stunning low light images.
2. Use a Wide Aperture
In low light situations, it's crucial to maximize the amount of light entering your camera sensor. One way to achieve this is by using a wide aperture setting. Opt for lenses with a lower f-number, such as f/1.8 or f/2.8, to allow more light to pass through to the sensor. This will not only brighten your images but also help create beautiful bokeh effects in the out-of-focus areas.
3. Experiment with Long Exposures
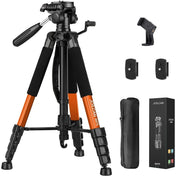
Long exposure photography is a technique that can produce stunning results in low light. By using a longer shutter speed, you can capture more light over an extended period of time. This allows you to create mesmerizing light trails, silky smooth waterfalls, or even capture the movement of stars in the night sky. To steady your camera during long exposures, consider using a tripod.
4. Master the Art of Handheld Shooting
While a tripod is essential for long exposures, there will be times when you need to capture low light images handheld. To achieve sharp results, it's crucial to stabilize your camera. Use proper hand-holding techniques, like keeping your elbows close to your body, exhaling gently while pressing the shutter, and using image stabilization if your lens or camera has it. Additionally, using a higher ISO can compensate for the lack of light and help freeze motion.
5. Understand ISO Sensitivity
ISO determines the sensitivity of your camera's image sensor to light. In low light conditions, increasing the ISO can brighten the image. However, higher ISO settings also introduce digital noise or grain. It's important to strike a balance between a higher ISO for brighter images and a lower ISO to maintain image quality. Take test shots at different ISO settings to find the sweet spot for your camera equipment.
6. Utilize Available Light Sources
When shooting in low light, make the most of available light sources. Whether it's streetlights, candles, or even the moon, these sources can add a unique and dramatic flair to your images. Experiment with different angles and perspectives to create captivating compositions that highlight the interplay of light and shadow.
7. Use a Flash or External Lighting
A well-placed flash or external lighting can make a significant difference in low light photography. Use a diffuser or bounce card to soften the harsh light of the flash and create a more natural look. External lighting options, such as LED panels or portable studio lights, provide more control over the direction and intensity of the light. By mastering the art of artificial lighting, you can illuminate your subjects and create more balanced exposures.
8. Shoot in RAW
When shooting in challenging lighting conditions, shooting in RAW format offers numerous advantages. RAW files retain the maximum amount of data captured by the camera sensor, allowing for more flexibility in post-processing. This is especially useful in low light photography, where you may need to adjust exposure, white balance, or reduce noise in your images. Processing RAW files can help you unleash the full potential of your low light shots.
9. Focus with Precision
Accurate focusing is crucial in low light situations where the camera's autofocus may struggle. Switching to manual focus can be a more reliable option in these conditions. Use the camera's live view to zoom in on your subject and manually adjust the focus until it's tack sharp. Additionally, consider using a flashlight or laser pointer to help you achieve precise focus on your subject.
10. Post-Processing Magic
Even the best low light images can benefit from some post-processing magic. Experiment with adjusting exposure, contrast, and color balance to bring out the hidden details and enhance the mood of your shots. Be cautious not to overdo it, as excessive editing can lead to unnatural-looking results. Develop your own editing style that complements the atmosphere and subject of your low light photographs.
Elevate Your Low Light Photography Skills Today!
Low light photography presents a unique set of challenges but also offers incredible opportunities for creativity. By combining technical proficiency with artistic vision, you can capture breathtaking images in the darkest of environments. Remember to experiment with different techniques, push the limits of your gear, and have patience, as mastering low light photography takes time. With these expert tips in your arsenal, you're well on your way to becoming a low light photography maestro!