Photography is an art that transcends mere images; it’s a gateway to expressing emotions, telling stories, and capturing unforgettable moments. The technical aspects of photography can often seem intimidating for beginners. Among the various settings that come into play, ISO stands out as a vital component that influences the quality of your images. Understanding how to manipulate ISO can elevate your photography, allowing you to capture stunning shots regardless of the lighting conditions. In this article, we will explore the integral role of ISO in photography, how it interacts with other settings, and ways you can optimize your shooting experience.
What is ISO?
ISO stands for International Standards Organization, and in photography, it refers to the sensitivity of your camera's sensor to light. The lower the ISO number, the less sensitive your camera is to light and vice versa. This allows photographers to maintain optimal exposure levels in a variety of lighting conditions. But what does this mean for your photography?
The ISO Scale Explained
The ISO scale typically ranges from 100 to 6400 and above in modern digital cameras. Here’s a breakdown of common ISO settings:
- ISO 100: Ideal for bright conditions and outdoor shooting, it ensures low noise and high-quality images.
- ISO 200: Slightly more sensitive, suitable for overcast days or indoor settings with good natural light.
- ISO 400: Works well in moderately lit conditions, balancing image quality with exposure.
- ISO 800 and beyond: Useful for low-light scenarios, but results in more noise, impacting image quality.
How ISO Works with Aperture and Shutter Speed
The exposure triangle consists of ISO, aperture, and shutter speed, which work together to create a well-exposed image. Adjusting one setting necessitates adjustments to the others to maintain balance.
Understanding the Exposure Triangle
Here’s how ISO interacts with aperture and shutter speed:
- Aperture: The aperture controls the amount of light entering the camera. A wider aperture (lower f-number) allows more light, which can be beneficial in low-light situations, allowing for a lower ISO setting.
- Shutter Speed: This measures how long the camera's shutter remains open. A fast shutter speed will reduce light exposure, often requiring a higher ISO to compensate.
Mastering these three elements is crucial for achieving the desired exposure and artistic effect.
Understanding Noise in Photography
When increasing ISO, the downside is inherent noise—an unwanted grainy texture in your images. Understanding how to manage and minimize noise is an essential skill for any photographer.
Types of Noise
There are primarily two types of noise in photography:
- Luminance noise: Appears as grain in low-light photos. This type of noise is often manageable in post-processing if not overdone.
- Color noise: Manifests as random color speckles in your images, making it harder to remove during editing.
While higher ISO settings are necessary for dark environments, it’s important to find the sweet spot to avoid excessive noise. Knowing your camera's limits when it comes to ISO will help you achieve the best results.
Balancing ISO with The DIGIC 7 Image Processor
Modern cameras equipped with advanced image processors, like the DIGIC 7 image processor, have revolutionized the way photographers handle ISO settings. These processors enhance noise reduction, allowing for cleaner images even at higher ISO levels. Understanding how to take advantage of these technological advancements can be a game-changer in your photography journey.
Advantages of the DIGIC 7 Image Processor
The DIGIC 7 image processor offers several benefits for photographers:
- Improved Noise Reduction: The DIGIC 7 effectively reduces noise, which enables photographers to shoot at higher ISO levels without compromising image quality.
- Faster Processing: Enhancements in processing speed allow for quicker autofocus and real-time image adjustments, essential for dynamic shooting situations.
- Better Dynamic Range: This feature gives you greater flexibility in editing your images, making it easier to recover shadow details.
Utilizing the DIGIC 7 image processor can significantly enhance the outcome of your photography in challenging lighting conditions.
Tips for Optimizing ISO in Photography
Knowing how to adjust ISO is crucial, but how do you ensure that you're getting the best results? Here are some effective tips for optimizing your ISO settings:
Assess Your Lighting Conditions
Always consider your shooting environment. In bright daylight, a lower ISO will suffice, while in dim conditions, you may need to increase sensitivity. This simple assessment can guide your ISO choice and ensure the best possible exposure.
Experiment with Different ISO Settings
Don’t hesitate to experiment with your ISO in various scenarios. Take test shots at different settings and see how they affect image quality. Over time, you’ll develop an intuition for which ISO setting to use in each situation.
Use Raw Format
Shooting in RAW gives you the flexibility to edit your photos more extensively in post-processing. This is particularly beneficial for handling noise that may arise from higher ISO settings. You’ll appreciate the capacity to recover details and reduce noise.
Leverage In-Body Stabilization
In-body stabilization systems can allow for lower shutter speeds without introducing motion blur. If your camera has this feature, you can safely lower your ISO, thereby minimizing noise while maintaining image clarity.
The Art of Low-Light Photography
Low-light photography can be challenging yet rewarding. Mastering ISO is crucial in these conditions to create stunning images. Here are some key considerations for successful low-light photography:
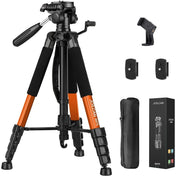
Utilize a Tripod
A tripod allows you to use longer shutter speeds without worrying about camera shake. This gives you the freedom to lower your ISO, thus reducing noise while capturing well-exposed images.
Explore Creative Compositions
When shooting in low-light conditions, creative composition can make all the difference. Experiment with angles and subjects that may naturally stand out against the darkness.
Focus on Light Sources
Identify your light sources when shooting in low light. Whether it’s streetlights, candlelight, or natural light from windows, utilize these sources to create mood and interest in your images.
Additional Tools for Enhancing ISO Performance
Aside from adjusting your camera settings, consider additional tools to improve your photography experience:
Lens Selection
A fast lens (one with a larger aperture) can allow more light to enter your camera, which is particularly beneficial for low-light photography. This means you can shoot at a lower ISO while still achieving a well-exposed image.
External Flash
If appropriate for your shooting style, an external flash can provide additional light, helping you maintain a low ISO. Much of flash photography is about balance, and this can help you create images with greater detail and clarity.
Understanding the Limitations of ISO
While playing with ISO opens up creative possibilities, it's crucial to recognize its limitations. Too high an ISO can lead to noise degradation. Remember that the goal of photography is to convey a sense of clarity and emotion, and excessive noise can detract from that.
Even with advanced technology like the DIGIC 7 image processor, there are limits to how high you can push your ISO before quality suffers. Always aim to balance your settings to achieve the best possible results.
Level Up Your Photography Skills
Understanding ISO and its role in photography is just the beginning. The more you practice and explore, the more proficient you will become in capturing mesmerizing images. Keep learning, keep experimenting, and let your creativity shine!
By mastering the essentials of ISO, you can transform your ability to capture extraordinary photographs, regardless of the challenges posed by lighting conditions. So next time you're setting out to shoot, remember that ISO isn’t just a number—it's a gateway to limitless creative possibilities.

