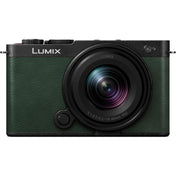
In the age of smartphones and point-and-shoot cameras, anyone can take a decent photo with just a click of a button. But if you truly want to unleash your creativity and capture stunning images, it's time to step up your game and master manual mode on your camera. Don't let those intimidating dials and buttons scare you - in this blog post, we'll demystify manual mode and give you the skills to take your photography to the next level.
Understanding Manual Mode
Manual mode, often represented by the letter "M" on your camera's mode dial, allows you to have complete control over the exposure settings - aperture, shutter speed, and ISO. Unlike automatic or semi-automatic modes, manual mode gives you the freedom to make intentional decisions based on your creative vision. Understanding how each of these settings affects your photo will empower you to create images that truly reflect your unique perspective.
Aperture: Controlling Depth of Field
Aperture, represented by the f/number, determines how much light enters your camera's lens. But it's not just about exposure; aperture also controls the depth of field in your images. A low f/number (e.g., f/1.8) produces a shallow depth of field, blurring the background and making your subject stand out. On the other hand, a high f/number (e.g., f/16) increases the depth of field, resulting in a sharper image from foreground to background. Experiment with different apertures to achieve the desired effect.
Shutter Speed: Capturing Motion
Shutter speed refers to the amount of time the camera's shutter remains open. It not only controls the exposure but also allows you to freeze or blur motion in your photos. A fast shutter speed (e.g., 1/1000s) freezes action, which is great for sports or wildlife photography. Conversely, a slow shutter speed (e.g., 1/4s) creates motion blur, ideal for capturing the graceful flow of water or streaks of light. Mastering shutter speed enables you to capture dynamic and visually captivating images.
ISO: Balancing Light Sensitivity
ISO represents the sensitivity of your camera's image sensor to light. In low-light situations, increasing the ISO can help you capture well-exposed images without the need for a longer shutter speed or wider aperture. However, be cautious as higher ISO values introduce digital noise or grain in your photos. Find the balance between a high enough ISO to capture the scene and the lowest possible ISO to maintain image quality. Modern cameras handle higher ISO settings well, but it's always best to experiment in different lighting conditions to understand your camera's limits.
Getting Started in Manual Mode
Now that we've covered the basics, it's time to put your knowledge into practice. Here are some steps to help you get started:
1. Set your camera to manual mode
Rotate your camera's mode dial to "M." Congratulations, you're now in control!
2. Adjust your aperture
Choose an aperture that suits your desired depth of field. Remember, a lower f/number for a shallow depth of field or a higher f/number for a greater depth of field.
3. Set your shutter speed
Determine whether you want to freeze or blur motion and select an appropriate shutter speed accordingly. Don't be afraid to experiment and capture different effects!
4. Balance with ISO
Depending on the lighting conditions, adjust your ISO to achieve a well-exposed photo. Test different ISO values to understand how your camera performs in various situations.
5. Fine-tune and practice
Take a few test shots, review the results, and make any necessary adjustments. Remember, practice makes perfect, so keep shooting in manual mode until it becomes second nature.
Mastering Manual Mode: Tips and Tricks
Now that you understand the basics, here are some additional tips and tricks to help you become a pro in manual mode:
1. Use a tripod for stability
When shooting in low light or using slower shutter speeds, a tripod can eliminate camera shake and ensure sharp images.
2. Utilize the light meter
Many cameras have a built-in light meter that helps you gauge the exposure levels. Aim for a balanced exposure, but feel free to intentionally over or underexpose for creative purposes.
3. Bracket your exposures
If you're unsure about the optimal exposure settings, take multiple shots at different settings to cover a range of possibilities. This technique, known as exposure bracketing, ensures you capture the perfect shot.
4. Experiment with white balance
White balance affects the color temperature of your photos. Play around with different white balance settings to create the desired mood in your images.
5. Embrace RAW format
Shoot in RAW instead of JPEG to retain more data and have greater flexibility during post-processing. RAW files give you more control over exposure, white balance, and other settings without sacrificing image quality.
6. Learn to read the histogram
A histogram is a graphical representation of the tonal distribution in your image. Understanding how to analyze the histogram allows you to make informed decisions for optimal exposure.
Expand Your Creative Horizons Today!
Whether you're a photography enthusiast or a professional, mastering manual mode opens up endless possibilities for capturing striking and expressive images. Don't be afraid to experiment, push your boundaries, and explore the full potential of your camera. So go ahead, switch to manual mode, and ignite your passion for photography!

