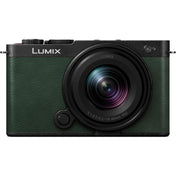
Photography is an art that revolves around the manipulation of light. One of the key elements that every photographer must master is the exposure triangle. Understanding how to balance aperture, shutter speed, and ISO can significantly elevate the quality of your photos. In this guide, we will delve into the intricacies of the exposure triangle and how you can use it to capture stunning images.
The Basics of the Exposure Triangle
At its core, the exposure triangle refers to the relationship between three fundamental elements:
1. Aperture
Aperture dictates the size of the opening in the lens through which light enters the camera. It is measured in f-stops, with smaller f-stop numbers (e.g., f/2.8) indicating larger openings and more light hitting the sensor. Adjusting the aperture not only controls the amount of light but also impacts depth of field, determining how much of the image is in focus.
2. Shutter Speed
Shutter speed refers to the amount of time the camera's shutter remains open to allow light to hit the sensor. A faster shutter speed (e.g., 1/1000 seconds) freezes motion, while a slower speed (e.g., 1/30 seconds) creates a sense of motion blur. Mastering shutter speed is crucial for capturing dynamic scenes with clarity.
3. ISO
ISO measures the sensor's sensitivity to light. A lower ISO (e.g., 100) is ideal for well-lit environments, producing images with minimal noise. In low-light situations, increasing the ISO (e.g., 1600) boosts sensitivity but may introduce graininess. Balancing ISO is essential for achieving optimal exposure without sacrificing image quality.
Optimizing Exposure Settings
When adjusting the exposure settings, it is crucial to consider the desired outcome of your photograph. Here are some tips to help you optimize each element of the exposure triangle:
1. Controlling Depth of Field
To create a shallow depth of field and blur the background, choose a wide aperture (small f-stop number). For landscapes or photos requiring greater depth, opt for a narrow aperture (larger f-stop number) to keep the entire scene in focus.
2. Freezing or Blurring Motion
When photographing moving subjects, a fast shutter speed is essential to freeze action. Sports, wildlife, and other dynamic scenes require quick shutter speeds to capture sharp details. Conversely, a slower shutter speed can convey a sense of movement, ideal for long-exposure photography or artistic effects.
3. Managing Low-Light Conditions
In low-light environments, increasing the ISO allows you to maintain a proper exposure without underexposing the image. However, be mindful of raising the ISO too high, as it can introduce digital noise. Utilize a tripod or image stabilization to compensate for longer shutter speeds in dim lighting.
Practical Applications of the Exposure Triangle
Understanding the interplay between aperture, shutter speed, and ISO opens up a world of creative possibilities in photography:
1. Portrait Photography
For portraits, a wide aperture (e.g., f/2.8) can produce a pleasing bokeh effect, isolating the subject from the background. Balancing this with an appropriate shutter speed ensures sharpness while capturing the nuances of facial expressions.
2. Landscape Photography
In landscape photography, a narrow aperture (e.g., f/11 to f/16) is typically used to maintain sharpness throughout the scene. Pairing this with a tripod for stability allows for longer exposures without compromising image clarity.
3. Action Photography
When capturing fast-moving subjects like athletes or wildlife, a combination of fast shutter speeds and continuous autofocus is essential. Adjusting the ISO based on lighting conditions ensures well-exposed action shots with minimal blur.
Experimenting with the Exposure Triangle
Mastering the exposure triangle is a journey of exploration and experimentation. By adjusting your settings and observing the visual impact on your photos, you can develop a keen eye for optimal exposure. Practice different scenarios and push the boundaries of your creativity to unlock the full potential of your camera.
Unlocking the Secrets of Stunning Photography
In conclusion, the exposure triangle is a powerful tool that empowers photographers to control light and create visually compelling images. By mastering the delicate balance between aperture, shutter speed, and ISO, you can elevate your photography skills to new heights. Embrace the art of exposure manipulation, and watch as your photos come to life with precision and artistry.

